
SwiftUI Checkboxes
swift swiftui ios
Using a checkbox in SwiftUI offers users a familiar method to mark the state of something. How can we make that happen however on iOS?
Using the Toggle view in SwiftUI allows us to turn change the state of something from one thing to another. For instance, let’s say you want to toggle on a feature, you could do this using the Toggle view. It’s important to consider the user’s experience, which includes familiarity with different things that make it easier for them to understand your UI.
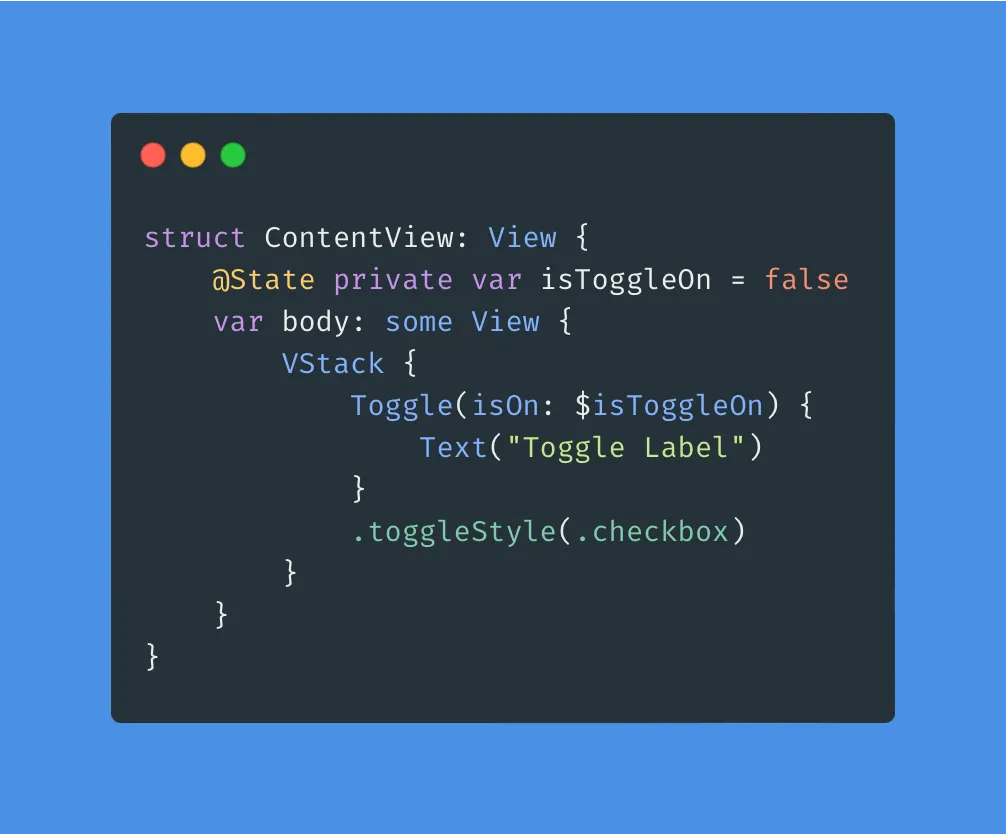
For this we can use ToggleStyle which allows us to change just that, the style of the toggle we display to the user. To do this we use .toggleStyle(.checkbox).
But what about iOS?
With SwiftUI certain things work on certain operating systems. In this case, using .toggleStyle(.checkbox) only works on macOS and if you try to use it within an iOS project Xcode will tell you just that. So how could we go about creating this for iOS?
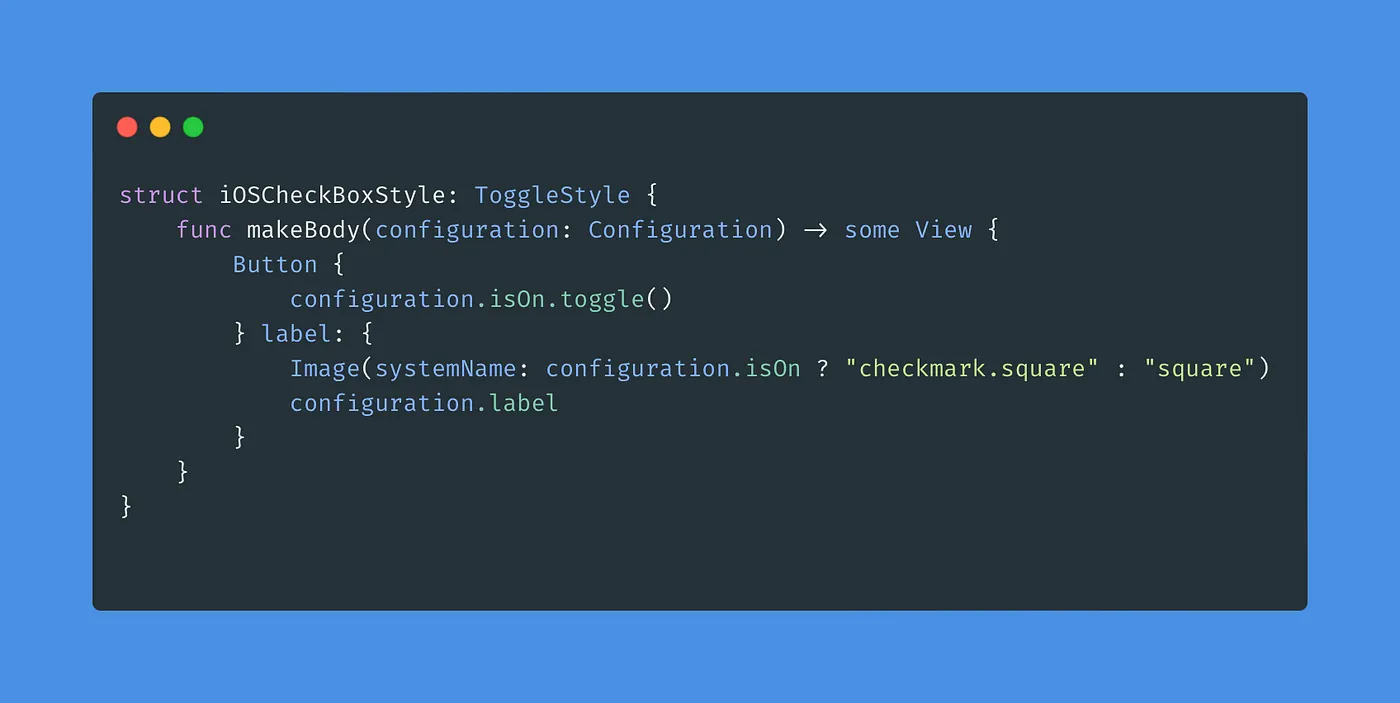
For this, we create a struct which conforms to the type ToggleStyle. Within this struct, we create a makeBody function which takes in a configuration and returns some View. Now we just can create a button that toggles the state of the configuration. The label or view portion of our button will be an SFSymbol with some text. We call configuration.label which will be replaced by the label text we use when using Toggle in our view.
One thing to note about using configuration is that you cannot change the parameter name. It must stay as configuration or the compiler will throw an error.
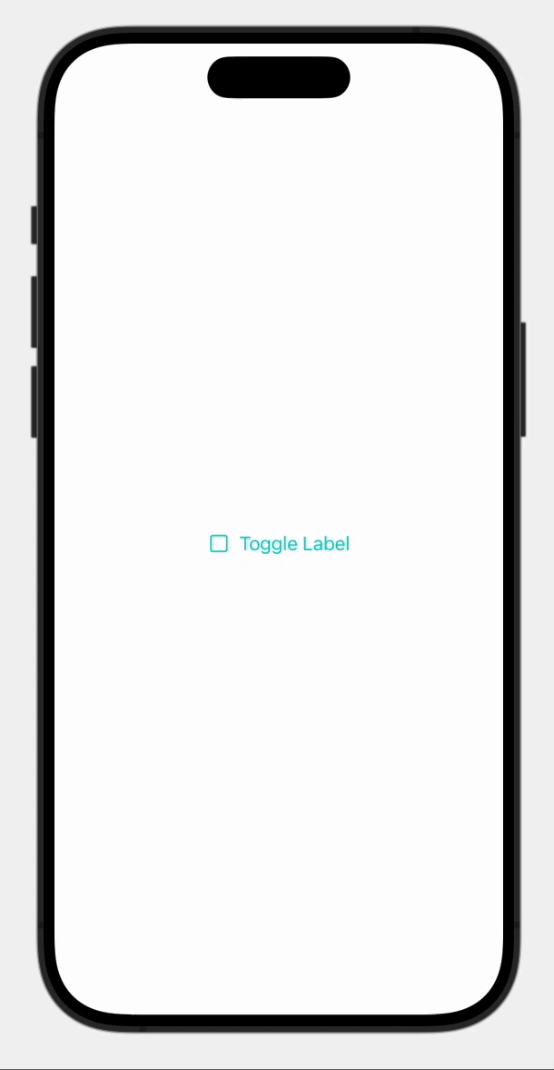
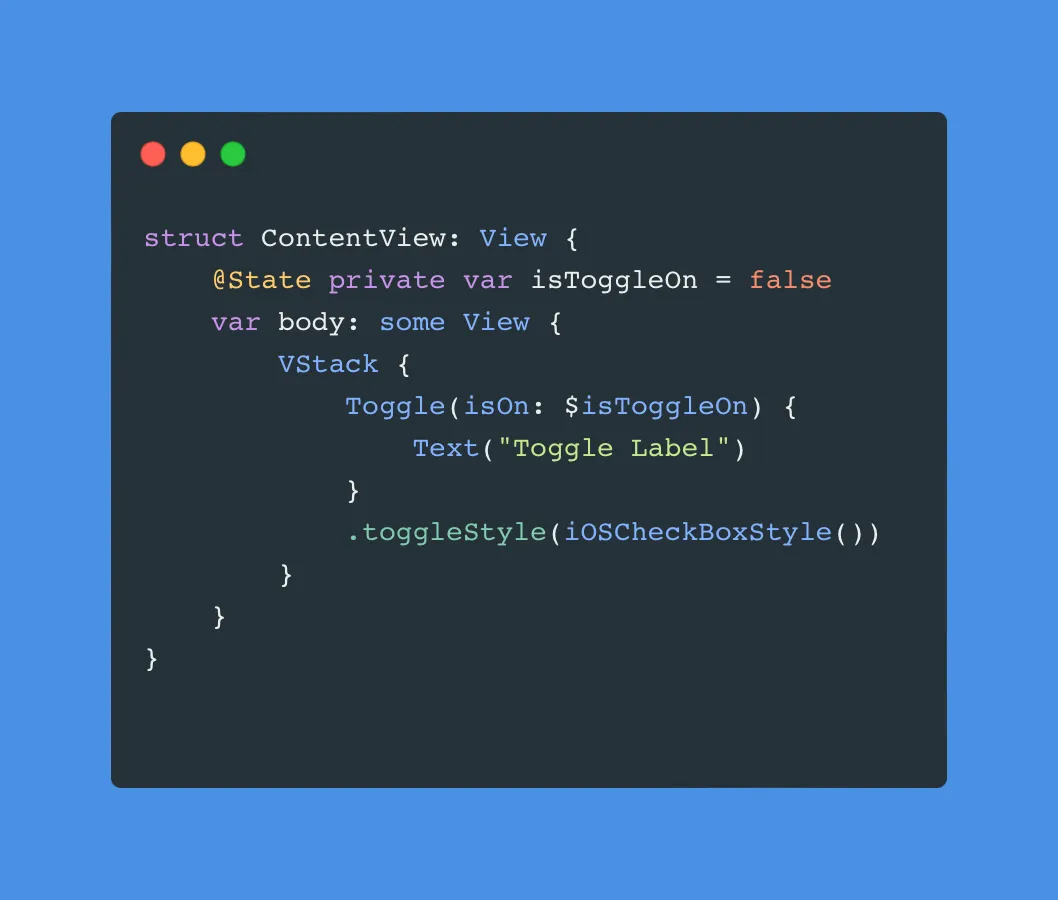
Simply initialize the custom style within the .toggleStyle modifier to use our new style. Just like that, we’ve created ourselves a custom checkbox for our iOS platforms.