Push Notifications with Vapor
vapor swift server-sided swift
Using a Vapor Community package, setting up a remote server for Apple Push Notifications to your existing Vapor project can be fairly easy. This article gives you a brief overview of that implementation.
Vapor APNS Package Dependency
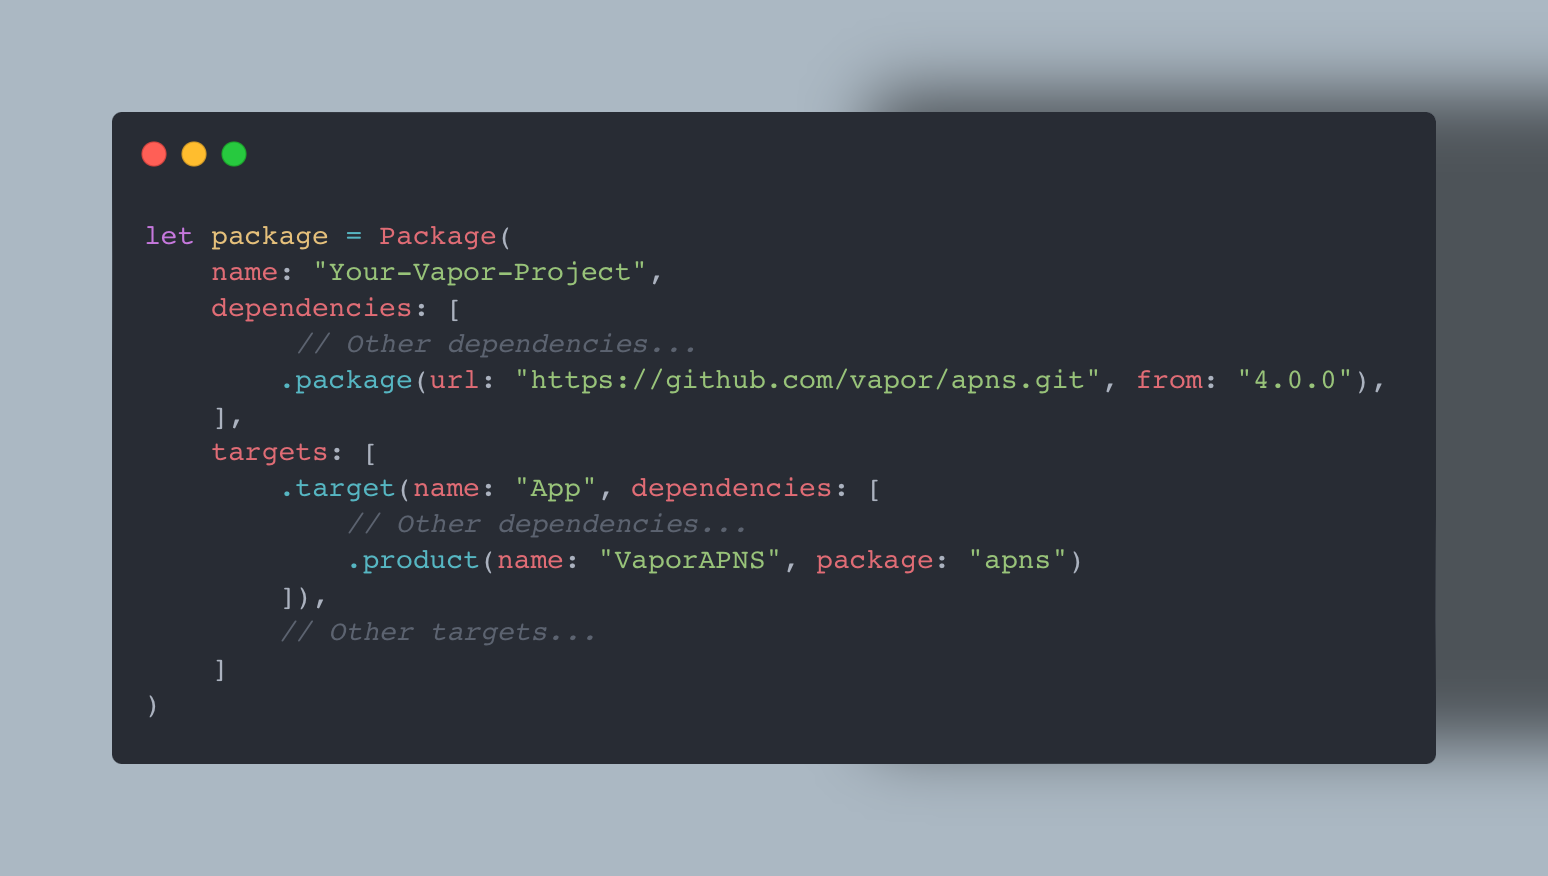
The Vapor APNS package as noted in its readme is an extension on the Swift Server Community package called APNS. The Vapor specific package adds helpful extensions specific to the Vapor framework making it easier to get integrated with your project. As with any other package you integrate into your project, you’ll add the package in the dependencies and Xcode will begin to import it.

Every device is unique!
On your client application, once the user approves notification permisions the device will generate a deviceToken. The way I understood the deviceToken is that it is essentially your devices address and is unique to that device so, if I wanted to send you a piece of mail, or in this case a push notification, this is where it would go. Once your client has generated the deviceToken you will need to save it somewhere in which it can be accessed by the server when you want to send the notification. For my application, I saved it to my User model.
Lets get configured!
With the Vapor APNS package imported, we need to ensure that we’ve setup the permissions for authentication in our Apple Developer Portal. To do this, you will need to enable push notification permissions via the Apple Developer Portal.
- Sign in to the Apple Developer Portal.
- In the left nav, click Certificates, IDs & Profiles.
- On the Certificates, IDs & Profiles page, in the left nav, click Identifiers.
- View your app’s details by clicking its App ID.
- On the Capabilities tab, scroll down and check the Push Notifications capability.
- Save your changes.
In order to send push notifications, your server needs to authenticate with Apple servers. In order to do this, you must decide on the a method of authentication. With that, my only input is using token based authentication as it was easier for me to follow and that is what will follow below.
- Token-based authentication (.p8 file) Recommended by Apple. With this approach, your server can use the same, non-expiring auth token to send push notifications. This is the fastest, most convenient, least error-prone way to authenticate with APNs. To set up token-based authentication:
- Follow the instructions Apple provides in Establishing a Token-Based Connection to APNs.
- Download the .p8 file. We will read this file and paste it into our Vapor project next.
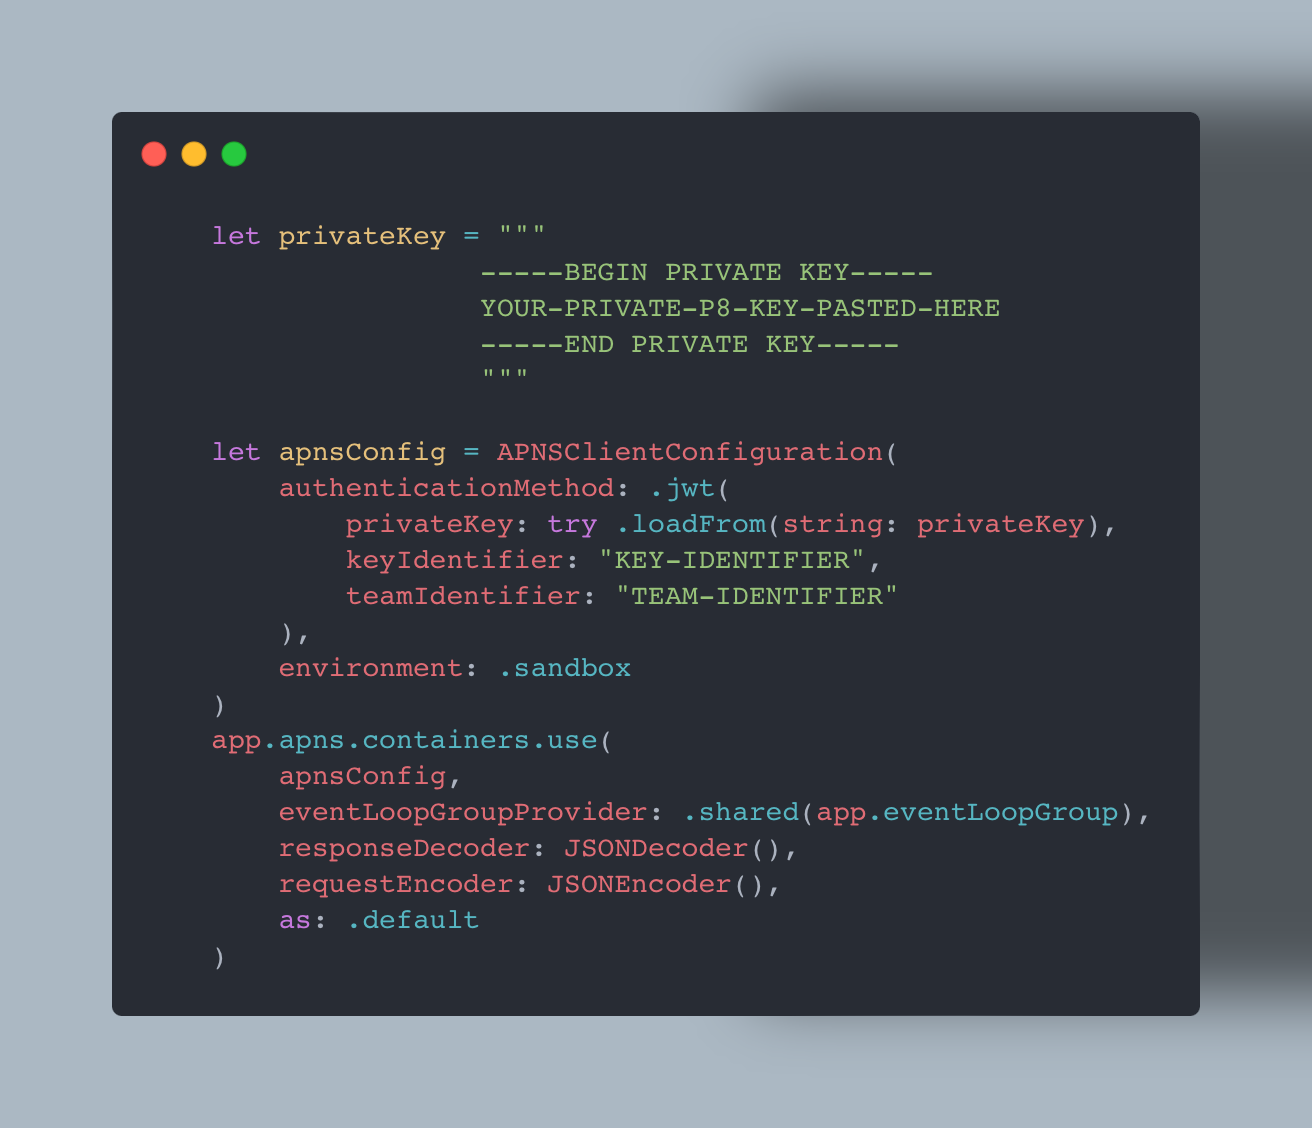
Once that is all squared away and you’re authenticated, we’ll jump into our configure.swift file and setup the configuration for Apple Push Notification Service (APNS).

This uses the .jwt configuration method and passes your .p8 key up to the Apple servers to authenticate with them. Then it uses the Vapor APNS package to set a container which helps manages the handling certificates, tokens, and multiple connections while maintaining thread safety.
As snowmobiling legend, Larry The Enticer once said… we’re just gonna send it. Apple has very thorough documentation on the payload so I won’t go into detail on it however, for my specific use case I send a blank payload.
To send a notification, we’re going to import APNS, APNS Core, and VaporAPNS into our file that we’ll use to handle sendind our notifications. We’ll use the APNS function sendAlertNotification which takes in a APNSAlertNotification and our deviceToken to make this happen.
The above code is doing the following things:
- Defining a empty payload as I’m not needing it for my application.
- Creating a APNSAlertNotification.
- Trying to send my alert using the APNS sendAlertNotification function.
Tip: You can use the Push Notification Console to send test notifications to ensure your client side is setup properly when you get to that step.
Wrap up
This about wraps up the steps needed to set up your own remote notification server using Vapor. I highly recommend you check out the Vapor documentation on this topic and if you have further questions, visit their Discord for community support.