
Firebase Authentication for Swift - Part 3
In Part 1 we setup the project and got things ready for authentication by importing the required packages. We moved onto Part 2 where we setup our file structure and got ready to register our first user. In this part, we’ll register that first user and get the most basic UI you’ve ever seen squared away.
Create the Sign Up UI
Design and User Interface is not my specialty, I cannot lie on that one so therefore in this instance we’re going to keep it super basic. We’ll create ourselves a few TextFields to handle user input and a submit button to fire our register function.
Jump over to your main app file, mine is MediumArticleApp, and add a @StateObject at the top and initialize it to our AuthViewModel(). Then we’ll jump down in the window group and add a .environmentObject() modifier and pass in your state object variable you just created. This will allow us to use @EnvironmentObject as our reference object to our view model so there is a single state shared across the entire project.
// Main App File.
import SwiftUI
import Firebase

@main
struct MediumArticleApp: App {
    @StateObject var authViewModel = AuthViewModel()
    init() {
        FirebaseApp.app()
    }

    var body: some Scene {
        WindowGroup {
            ContentView()
                .environmentObject(authViewModel)
        }
    }
}
// Content View file.
import SwiftUI

struct ContentView: View {
    @State private var email = ""
    @State private var password = ""
    @State private var fullname = ""
    @State private var username = ""
    @EnvironmentObject var authViewModel: AuthViewModel

    var body: some View {
        VStack {
            TextField("Full Name", text: $fullname)
            TextField("Username", text: $username)
            TextField("Email", text: $email)
            SecureField("Password", text: $password)
            Button {
                authViewModel.registerUser(withEmail: email, password: password, fullname: fullname, username: username)
            } label: {
                Text("Submit Registration")
            }
            .padding(.top)

        }
        .textFieldStyle(RoundedBorderTextFieldStyle())
        .padding(.horizontal)
    }
}
On our ContentView file, we’ll create a @EnvironmentObject variable which then will be a type refrence to our view model and two private @State variables and then initialize them with empty values which are a string. We’re going to then just keep it simple on the UI by creating a VStack with a few TextFields and a SecureField for the password. SecureField hides the text input which has it’s benefits and a few flaws such as the user being unable to see what password they entered.
Accessing our AuthViewModel
As seen above we will use the EnvironmentObject to access our AuthViewModel. This will allow us then to access the function we created! We can then pass in our state variables. Then the fun begins! Let’s fill out the form and click our button to submit it.

If everything goes as planned and you get no errors, let’s hop into our Firebase Authentication console. Once there, you should notice that you have an entry that includes a uid, email, and some other metrics. Once you’re done poking around there, jump over to the Firebase Firestore console (selected from the left list) and you should see a users collection and a new user that is there with more information!
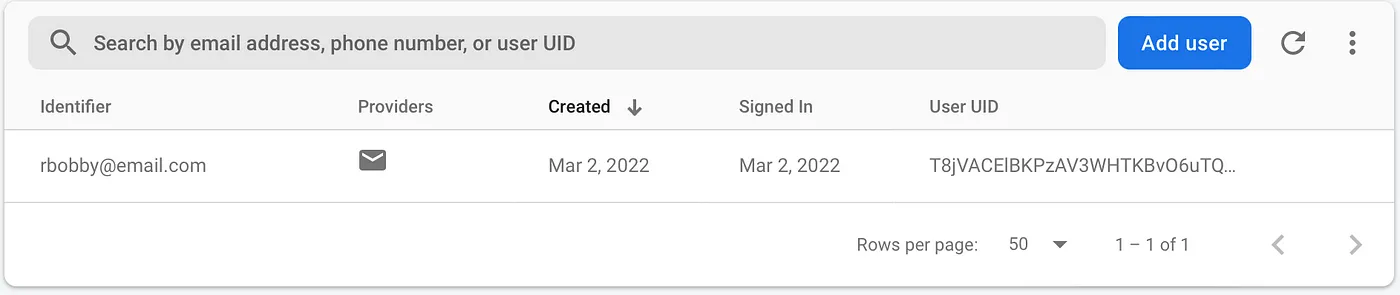
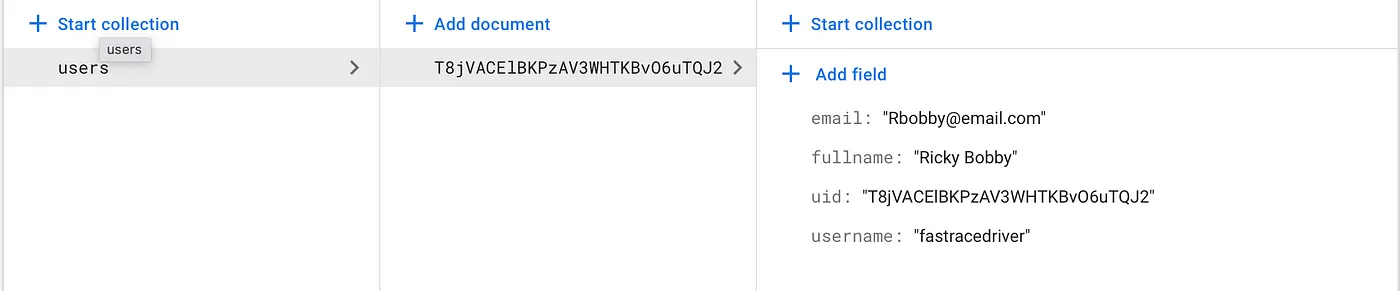
Note: The document id and collection id should match as well as should match the authentication User UID. This is important for future functions we will create.
Wrapping Up
Just like that, we’re wrapping up part 3 which I hopefully was able to portray in a super easy and understandable manner. In this section, we were able to create a quick down and dirty UI for adding a user and we’ve also gone ahead and created our first user to both our Firebase Authentication platform and our Firebase Firestore!