Firebase Authentication for Swift - Part 2
Preparing for Registration
If you missed the initial setup, I welcome you to jump back to Part 1 where I help introduce you to getting Firebase integrated into our project, our Firebase Console setup, and our application ready for the future.
We’re going to take a look at how to get the registration feature working and our goal is to complete the following tasks…
- Allow users to register an account.
- How to save more data than just email and password.
To get us rolling, we’re going to begin to flesh out our architecture which leads us down an interesting path where you get to make a decision because I will NOT be making that decision for you.

The bottom line is to keep it stupid simple, and clean. The rule of thumb is to keep your business logic completely separate from your UI. I recommend if you’re not comfortable with doing so — get this working for you and then refactor it later.

Let’s get functional!
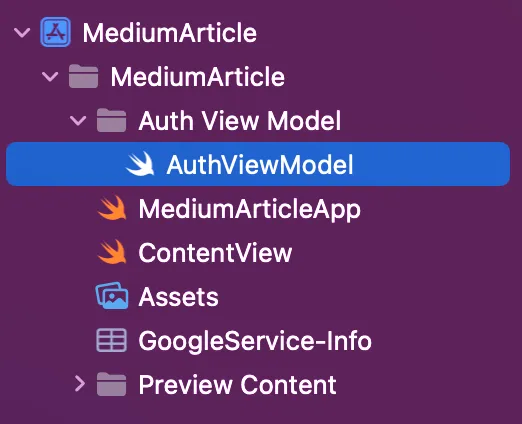
Create a new Swift file, as you can see here I am naming mine AuthViewModel and I’ve placed it in its own folder. Inside of that file, we’re going to import Firebase for now. Then we’re going to create a class of the ObservableObject type.
Once you’ve done that, we’re going to create a few private let variables. This is important because we only want to access these within this class and nowhere else within our project. Then comes the functional fun!
import Firebase

// MARK: - Create our class of type ObservableObject which will allow us to access @Published variables we will create later.
class AuthViewModel: ObservableObject {

    // MARK: - We're going to create two private let's, remember that let's are constants and cannot be mutated. Private means that we can only access those lets here in this file and no where else. The auth variable allows us to access Firebase Authentication methods and such, the firestore will allow us to access the Firestore ones.
    private let auth = Auth.auth()
    private let firestore = Firestore.firestore()

    // MARK: - This is our registration function which allows us to simultaneously create a user within the authentication system and a entry within our Firestore database which allows for saving additional information.
    func registerUser(withEmail email: String, password: String, fullname: String, username: String) {

        // MARK: - As you can see here, we're using our private let "auth" to keep this simple. We're accessing the .createUser(withEmail ...) method within Firebase Authentication platform. We're catching our errors and then protection our result which could be optional.
        auth.createUser(withEmail: email, password: password) { result, error in
            if let error = error {
                print("DEBUG : Failed to register user with \(error.localizedDescription)")
                return
            }

            guard let user = result?.user else { return }

            // MARK: - This let allows us to map out our data which will be added to our Firestore. This is the spot you would add any additional data you want to store from the user that is not just their basic email and password.
            let data = ["email" : email,
                        "username" : username.lowercased(),
                        "fullname" : fullname,
                        "uid" : user.uid]

            // MARK: - This "self.firestore" is accessing our firestore let above in line 15 which once again accesses methods within Firebase Firestore.
            self.firestore.collection("users")
                .document(user.uid)
                .setData(data) { error in
                    if let error = error {
                        print("DEBUG : Failed to add user to collection with \(error.localizedDescription)")
                        return
                    }
                    print("DEBUG : User data set.")
                }
        }
    }
}
Create a function which we’re calling registerUser with parameters that include the required and desired items needed to register the user. Once inside the function, we’ll access our private let auth and access the createUser method within Firebase Authentication passing in our email and password.
Then we’ll guard our result in case we throw an error as it is optional, we don’t want to completely crash our application, we just want to handle our error and go from there.
We’ll then create a dictionary of our data which we will then use to add to our newly create Firestore Collection. If all goes as planned… it will successfully add a user to our Firebase Authentication and Firebase Firestore.

Wrapping Up
Just like that, we’ve created a file which we’ve made to access in the future on our views. This file houses our newly created registration function which will not only add the user to our Firebase Authentication but will add it to a Firebase Firestore collection so we can access and retain more than just the basics. Be sure to checkout Part 3 for registering our first user, and handling any errors that may arise.